Here you will find a brief description of my lesson plans, the lesson plan, and examples of student work.
Art Foundations Class
The lessons you will see below is based on the Unit concept Illusion. In this unit the students will focus on drawing while trying to create the illusion of depth and form.
Click on images Below to see full Unit Plan on Illusion.


Illusion Lesson 1 Shading Techniques
The first lesson was on different shading techniques. They learned about stippling, hatching, cross hatching, and shading. They had to demonstrate all four in four different spheres. While doing this they had to show with each shading technique the highlight, core of the shadow, cast shadow, and the reflected light.
Click on image below to see full lesson plan on Shading Techniques


Illusion Lesson 2 White Still Life
In this lesson the students drew a still life from observation. All of the objects in the still life were white. The should have adapted the skills they learned from the first lesson and used it to help them on this lesson. Before they sketched the entire still life I focused on a few objects in the still life and broke them down to their basic shapes to help the students draw them better. The students were taught the drawing formula to guide them as well. They first sketched the still life with all the lights on in the classroom. Then we turned the spot lights on to make the shadows more dramatic. At this point the students could either choose to shade the entire still life or to pick a 6″x6″ section and only shade that section and do a contour outline with the rest of the drawing. This was a choice they were able to make if the students were overwhelmed with shading the entire still life. Lastly they choose one color pencil to do the entire shading and outlining with.
Click on image below to see full lesson plan on the White Still Life


Student Work


Illusion Lesson 3 Surreal Accordion Book
In this lesson I introduced what surrealism is and showed a powerpoint of artwork during this movement. I taught the students the different surrealism techniques. The major technique we focus for this project was transformation. Each student had to pick an object from a bin I had. They then practiced in their sketchbooks drawing the object first realistically. Then they had to look at the object carefully and brainstorm on what the object could transform into. They then created a four page accordion book. The first page the object is drawn realistically and the last page the object is transformed into the new object and the pages in between you see the object transforming. They then had to add a background for the object but the background had to go with the object that it transformed into. After they finished that we made a stencil that outlined the shape of their original and the stenciled a design with it on the front and back covers.
Click on image below to see full lesson plan on Surreal Accordion Book


Student Work


Drawing, Painting, Printmaking Class
The lessons you will see below is based on the Unit concept Inspiration. In this unit the students will focus on how music inspires artist.
Click on images below to see full unit plan on Inspiration


Inspiration Lesson Instrument Contour Line Drawings
Students drew contours of musical instruments from observation and created a balanced composition based on line. The students went over it with marker and then embellished the background to enhance the feeling of music.
Student Work


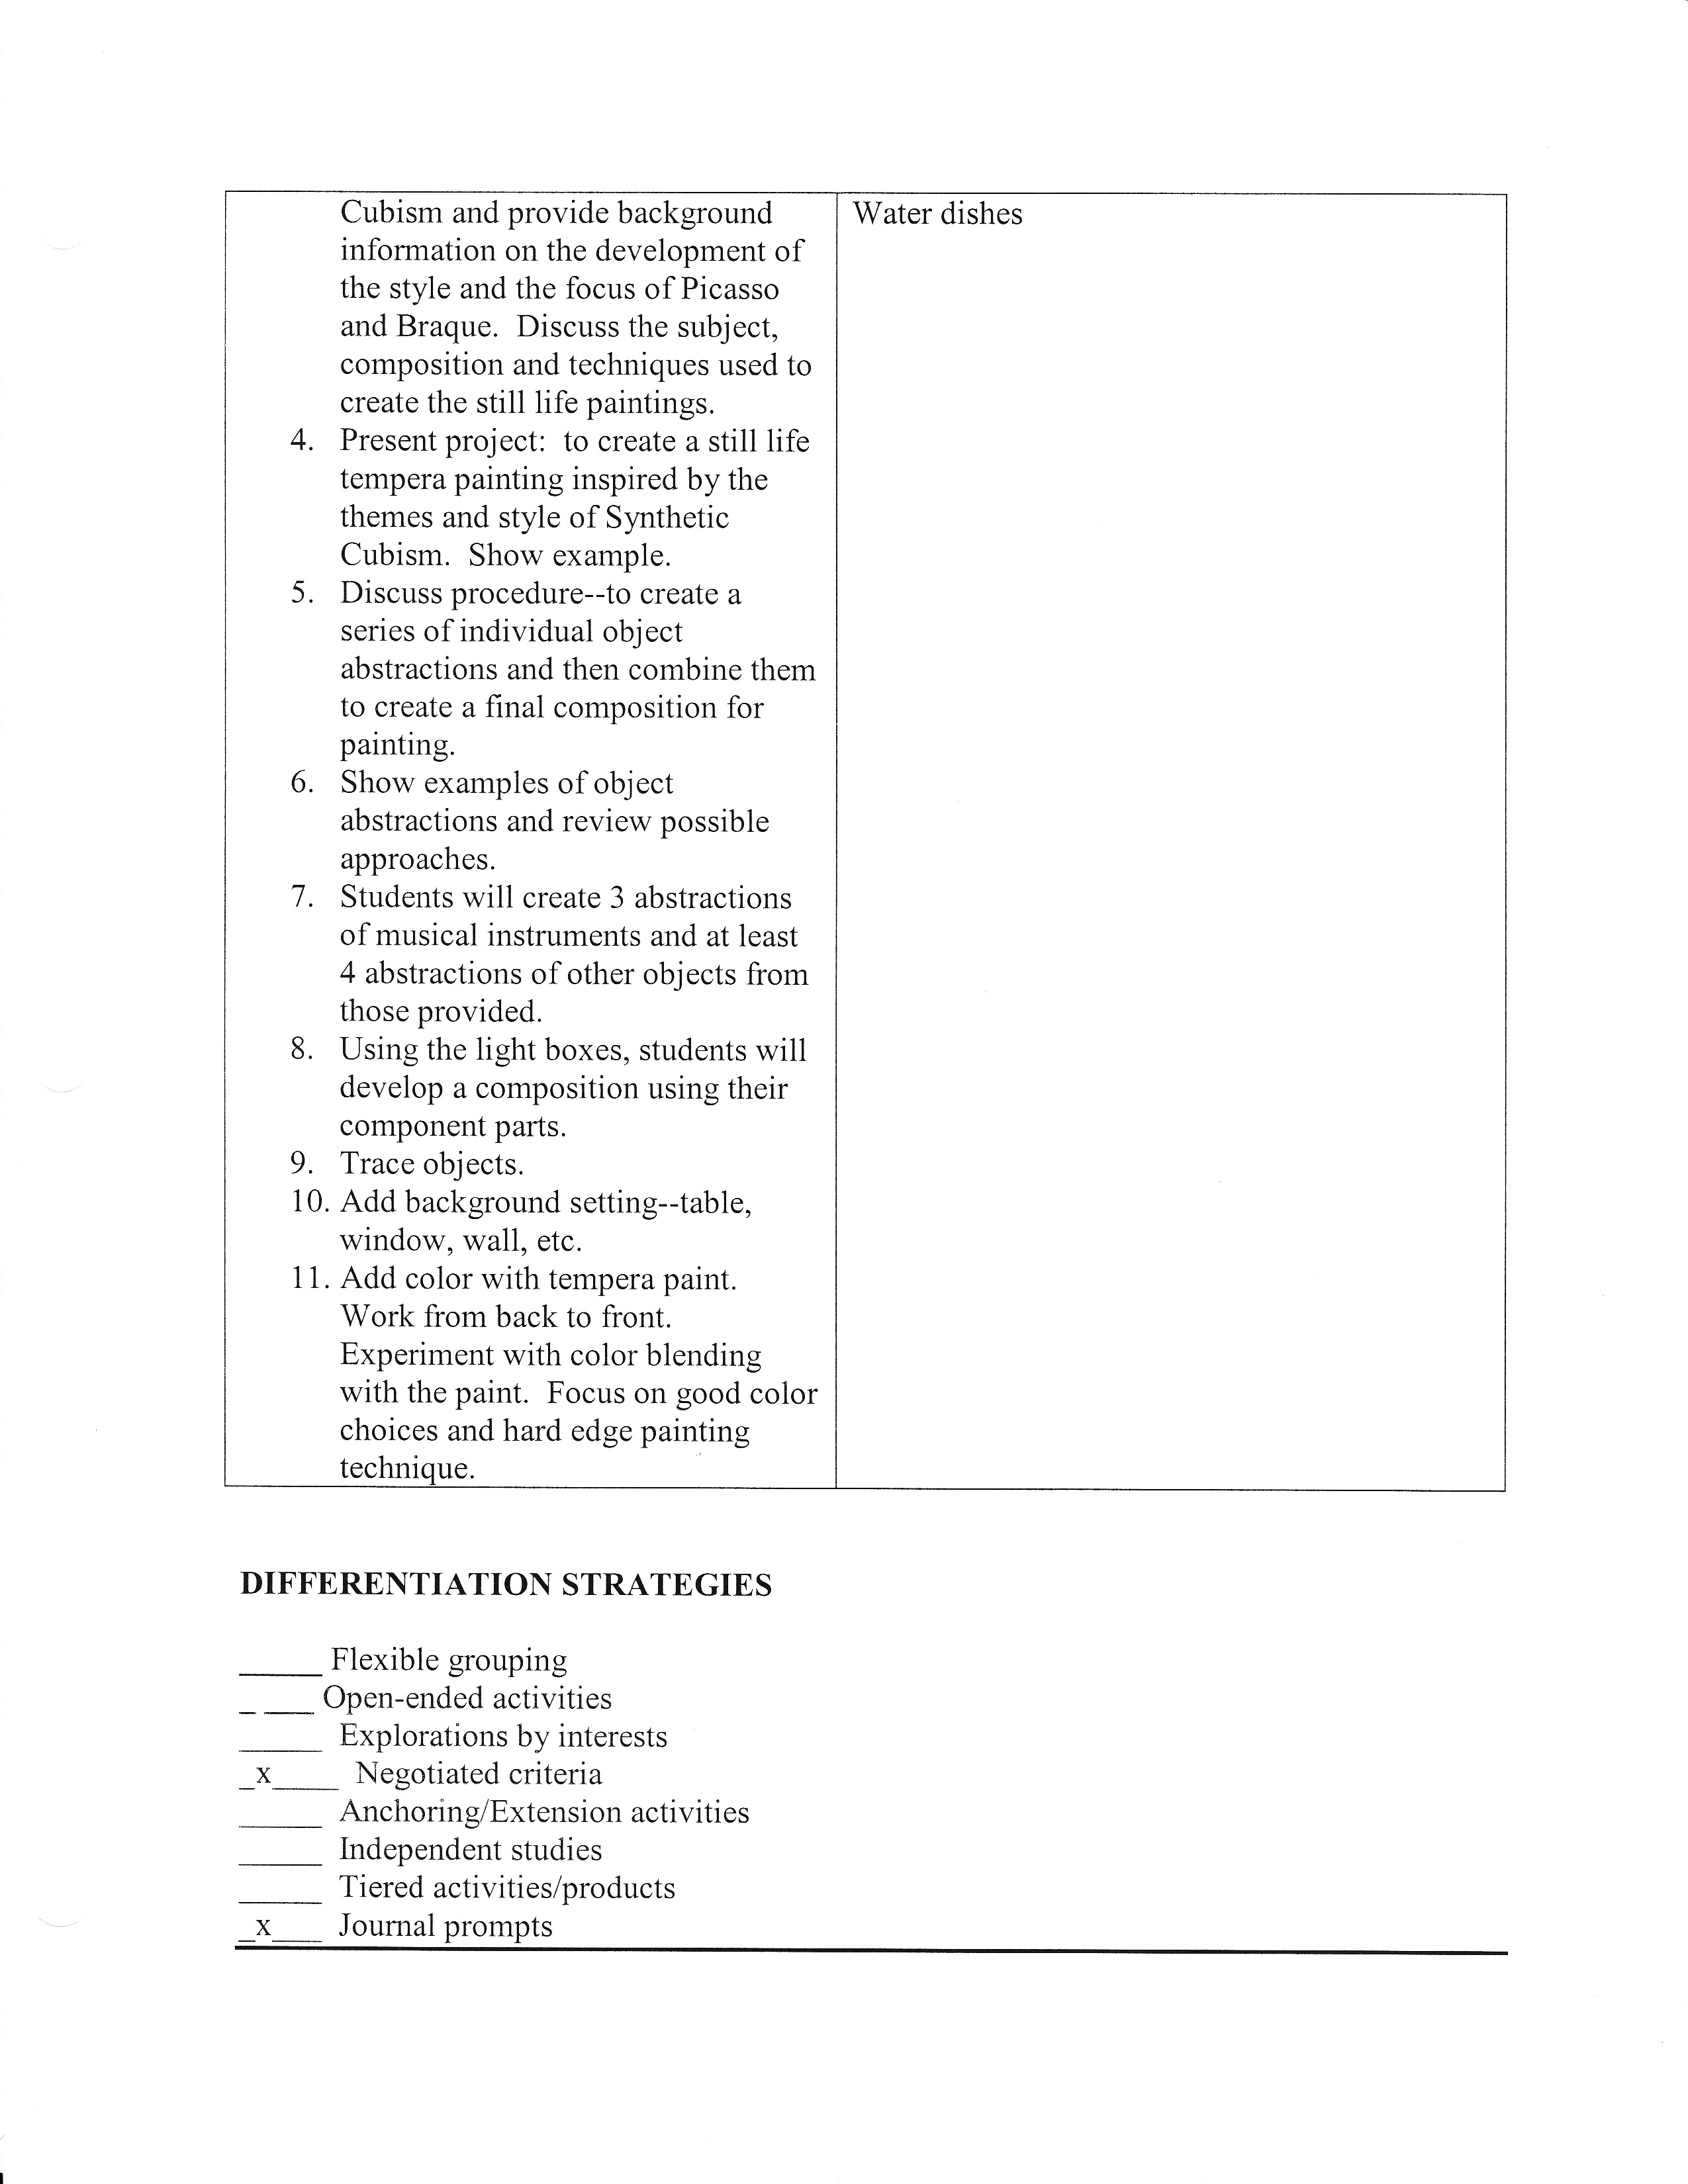
Inspiration Lesson Cubist Still LIfe Paintings
In this lesson students will study work of Cubist work of Pablo Picasso and Georges Braque and then create an abstract still life painting in tempera that incorporates musical instruments and other objects.
Click on images below to see full lesson plan on Cubist Still Life Painting


Work in Progress

 Example
The lessons you will see below is based on the Unit concept Movement. How can the movement of the human figure be interpreted in artwork? What ideas can be communicated through movement of the human figure?
Click on link below to see full Unit Plan on Movement
This is a bulletin Board I did  for the Unit Movement
Movement Lesson Leporello Accordion Book
In this lesson I introduced figures and movement in particular dance movements. I showed a powerpoint of all different styles of dancing. Then the students created figures in their sketch books that were in different dance movements. They created monoprints out of these and then turn the monoprints into pages and created a leporello accordion style book out of them.
Click on link below to see full lesson plan on Leporello Accordion Book
DPP accordion book lesson plan
Student Work


Work in Progress


Jenna
I really enjoyed your ideas, they were very detailed and creative. The images you included were great.
thanks for helping out your fellow art teacher! Great lessons
Superb. Your approach leaves me wanting to enter your class. I sense a grand cloud of peace in your environ. Student work is reflecting this, and the joy of art.
How can I see your plans. They look blurry when I click o n them. Can you email them to me. I look your ideas. Kimberly kdaniel@dcbe.org
What ones were you having a problem with? I just went and checked and they are all downloadable or are large enough to be readable?
Hi Jenna Illusion Unit 1 plan and others are very small when I click on them. I only found one that enlarged where I could read it. I took a photo and am attaching it. I have clicked and dbl clicked and blown up but it is just fuzzy. Thanks for acknowledging my email and thanks for any help you can give. Kimberly
Kimberly Daniel Art Instructor Creek Wood High School
>>> JENNA RODRIGUEZ 8/20/2013 8:42 PM >>>
Jenna commented: “What ones were you having a problem with? I just went and checked and they are all downloadable or are large enough to be readable?”
Kimberly: I fixed it so hopefully there is no problem.
Hi I am trying to use your ” Inspiration Lesson Cubist Still LIfe Paintings” but the third part of the lesson, 3rd page is not opening when I click on it. Also some lessons of the lessons are clickable but when I enlarge them they are huge. Do you have links to each of the full lessons as I would love to use them in my class. Let me know and thanks for your wonderful lesson plans.
Victoria,
I fixed the 3rd page of the lesson plan. You should not have a problem clicking on it now. Also if you click on a lesson plan it will open up a page then drag it to the desktop to save it. If you just click on it again then it zooms in and makes it very big. Hopefully that makes sense. Good luck. Let me know if you have any further problems!
Thanks a million Jenna-really thanks!
No problem!
Loved your ideas and plan to use some of them. I teach HS art in Iowa. Thanks for posting these!!
Hi–can you give me some more details about the monoprinting process for the dance book? I love your work.
Sure! I gave each student a sheet of plexi. We used relief printing ink (I did this in the winter time and it was very dry air so the ink was drying extremely fast so to slow down the dry time I boiled some water to bring moisture in the room. You want to use inks or paints that will not dry super fast because it takes the students time to layout their design before printing). Then I had them draw sketches in there sketch book of their dance moves and any props. I told them to simplify them and try to do silhouettes. Then they took transparencies and traced their sketches with a parmanent marker. They cut them out with exactos or scissors. Then with brayers hand inked the plexi for back ground and then inked the transparencies laying them out on top of the plexi and then placing paper on top and rubbing with hands or clean brayer. I hope this is clear and helpful! Happy Printing! 🙂
Hi Jenna, really great project ideas! I am a high school teacher in the bronx ny and I’m going to try your still life project. Do you have a digital copy of the formula for drawing worksheet you gave your students? and quiz too? Thanks! It would be super helpful.
I am glad the lessons are useful! I apologize I do not have any digital copies except what was uploaded. That information was on an old computer and I no longer have the files! 😦 There is a small possibility that I have it on an external hard drive but I am not sure where. If I come across it I will respond to your comment again. Sorry. Good luck with the lesson!